XLPack for Python Installation Manual
1. System requirements
– Windows 11 or Windows 10 (22H2 64 bit version)
– Excel for Office 365, Excel 2024 or Excel 2021 (64 bit version)
– Python 3.13 or later (64 bit version)
Before installing this software, update your software to the latest versions.
2. Installing Python
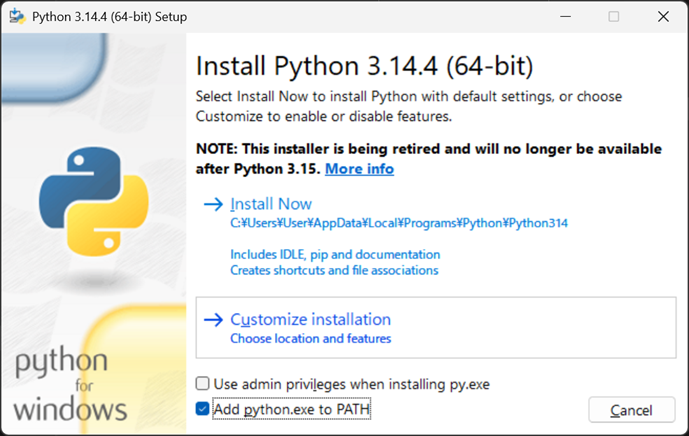
First, make sure that Python 3.13 or later is installed and running properly. When installing Python, be sure to check the option “Add python.exe to PATH.”
3. Installing XLPack for Python
Double-click the installer to launch it and follow the on-screen instructions. The installation is performed on a per-user basis.

4. Setting up your Excel
After installation of the software, you need to set up the Excel.
4.1 Enabling add-in
In Excel, select “Developer” tab, and click “Excel Add-Ins”.
From the list of available add-ins, check “XLPack for Python” and click “OK.”

This setting will remain in effect whenever you open Excel thereafter, regardless of which Excel file you use.
Note – If you cannot find the “Developer” tab, select “File” tab -> “Options” -> “Customize Ribbon” and check “Developer”.
4.2 References setting
Open Excel file and run Visual Basic editor by clicking “Visual Basic” button in “Developer” tab. Select “Tools” -> “References” and check “XLPack_PY”. The reference settings apply only to the Excel file in which they are configured.

Note – You need to configure the reference settings for each Excel file that uses XLPack for Python. Since the reference settings are saved within the Excel file, you do not need to configure them again the next time you open it.
5. Uninstalling XLPack for Python
To uninstall XLPack for Python, use “Settings” -> “Apps” > “Apps & features”. Choose “XLPack for Python” and click “Uninstall”.

